Stuart Briggs

Living with sarcoidosis, the good, the bad, and lots of in between.

How to lower the action on acoustic guitar explained easy

Factory settings

One of the main reasons why your newly delivered acoustic guitar requires the string action lowering is because most mass produced acoustic guitars are manufactured in the Far East. The temperature ranges upon transport can cause quite a bit of distortion within the guitars wooden body, thus when you receive your mail order guitar the chances are the neck will still be as per the factory setting and almost flat to compensate for the strings tension.

The truss rod and the nut are not covered in this advice, reason being; standard factory string height settings are usually as follows;

E6 – 2.38mm (6/64 in)
A5 – 2.28mm (5.75/64 in)
D4 – 2.18mm (5.5/64 in)
G3 – 2.08mm (5.25/64/in)
B2 – 2.03mm (5.15/64in)
E1 – 1.98mm (5/64in)

The truss rod should not be used to adjust the string action, its job is to straighten the neck and compensate for the upward pull of the strings. If the action is too high at the nut, it is the nut that needs adjustment. If the action is too high in the middle and upper positions, it is usually the saddle that needs to be lowered, this is what we are going to cover in the following easy steps on lowering acoustic guitar action. It will save you quite abit of money, for those in the U.K. lower your utility bills here, The Utility Warehouse works for me.

Measuring the string height

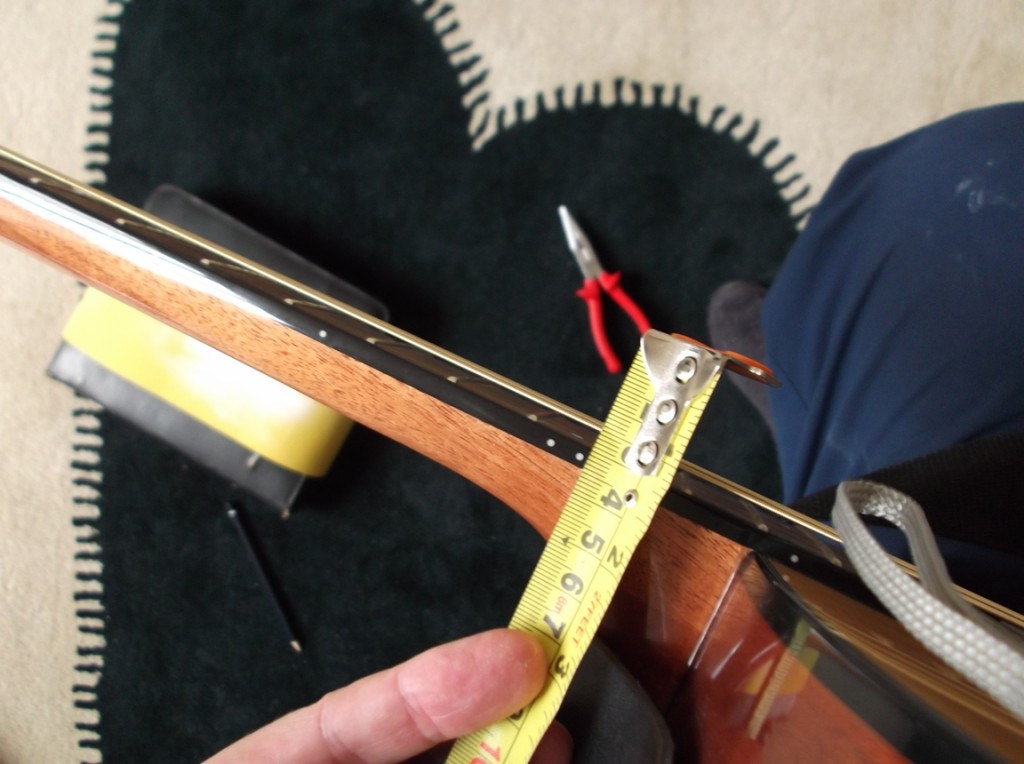
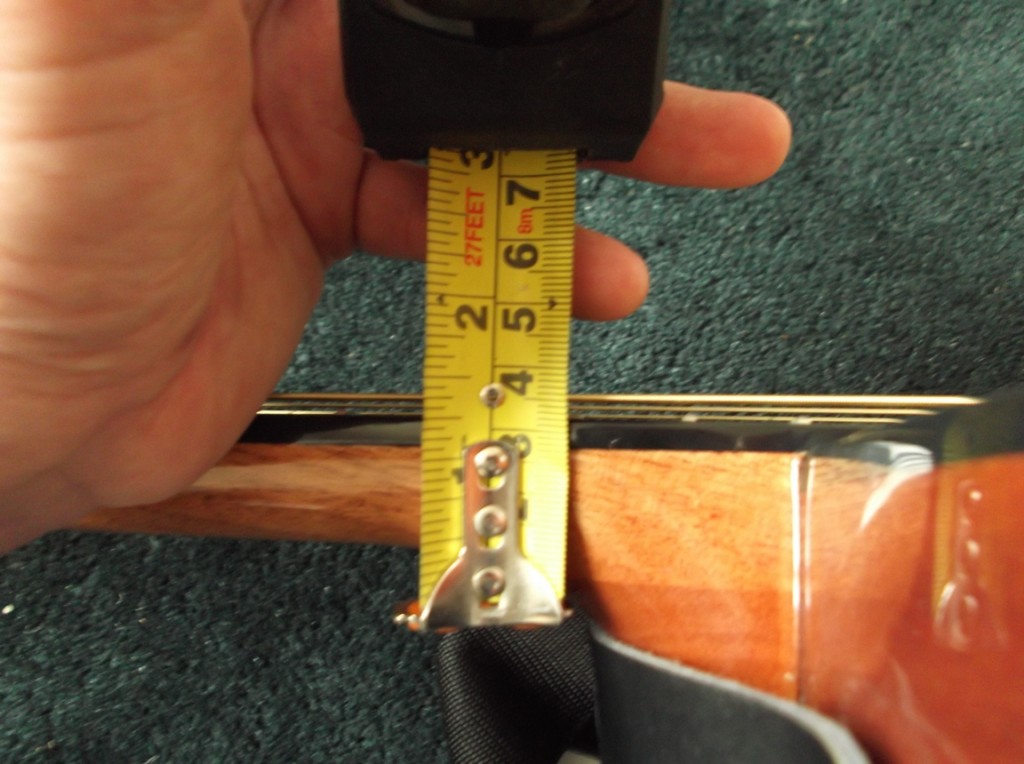
The guitar in the photos had string height of 4mm at the 14th fret on the E 6st string, this needed to be reduced down to as close as possible to 2,38mm, if you find that you can not remove enough material then it is possible you might require a new saddle, but 3mm is getting close, very nice and easy to play.

Tools required

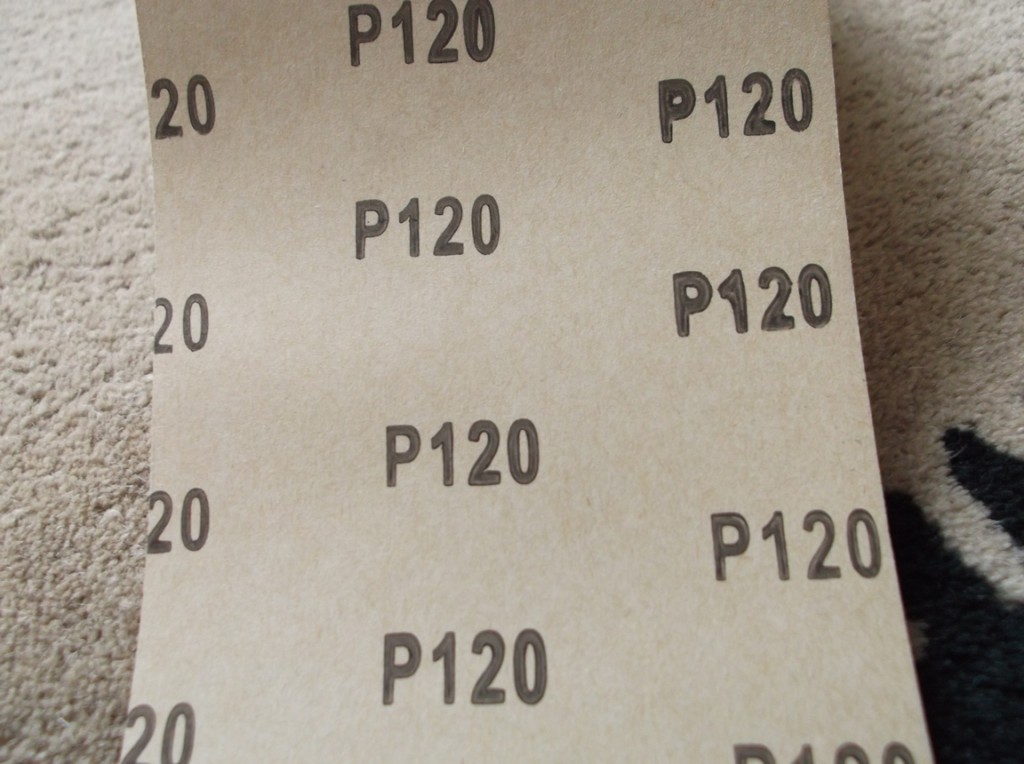
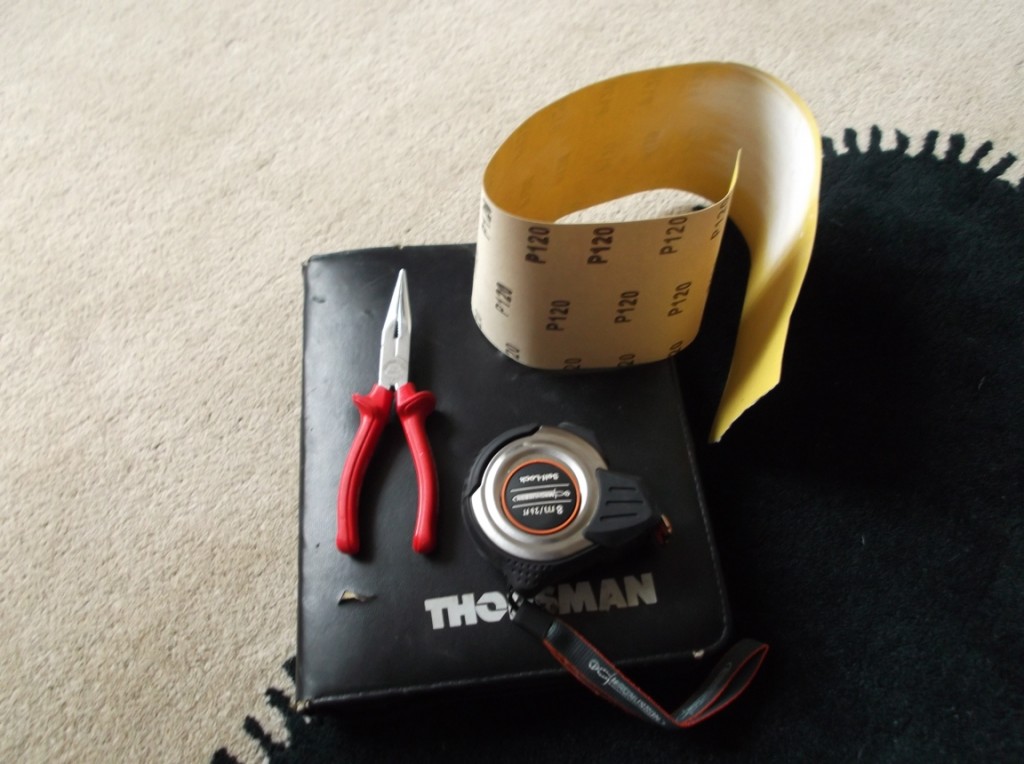
Very simple tooling; long nosed pliers, tape measure or ruler, pencil, and sandpaper. The chosen sand paper grit is P120 as it smooths off pretty quickly as soon as you start sanding the underside of the saddle. To fine a grain you might feel like your not getting anywhere despite all your sweating efforts.

Strings

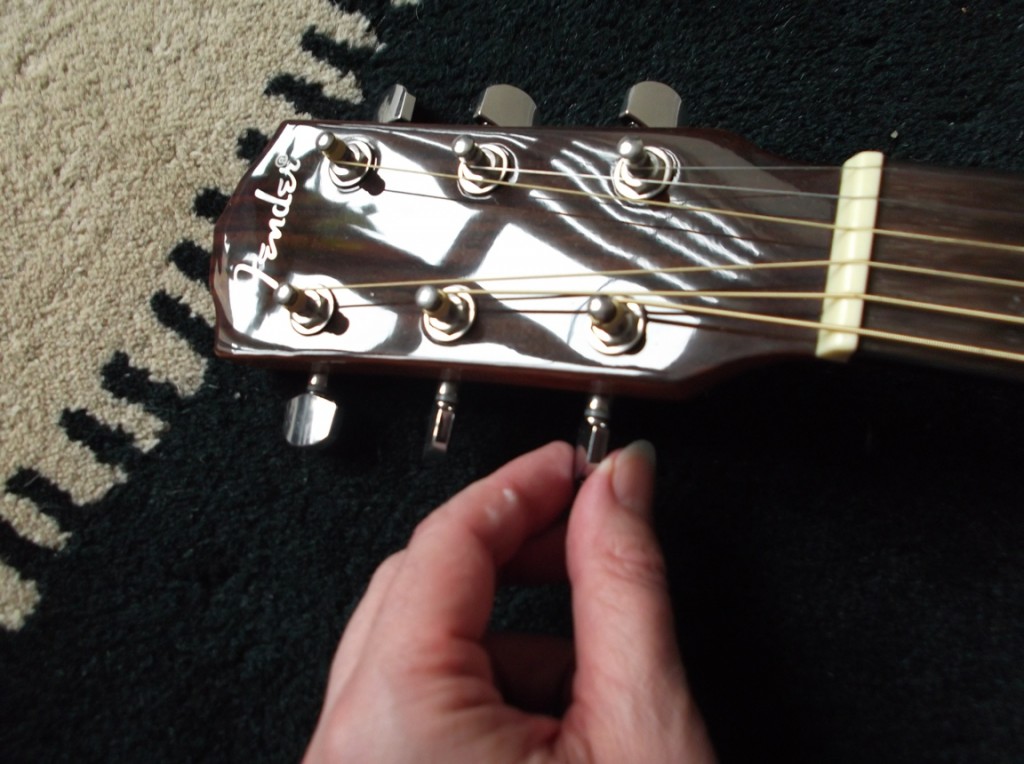
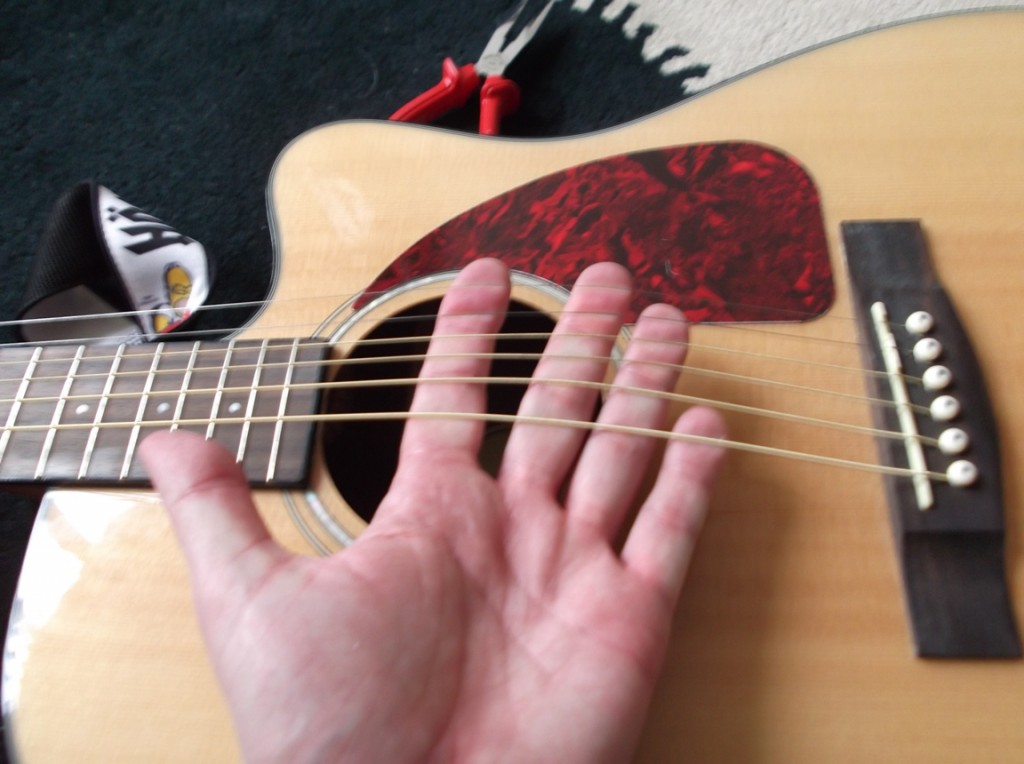
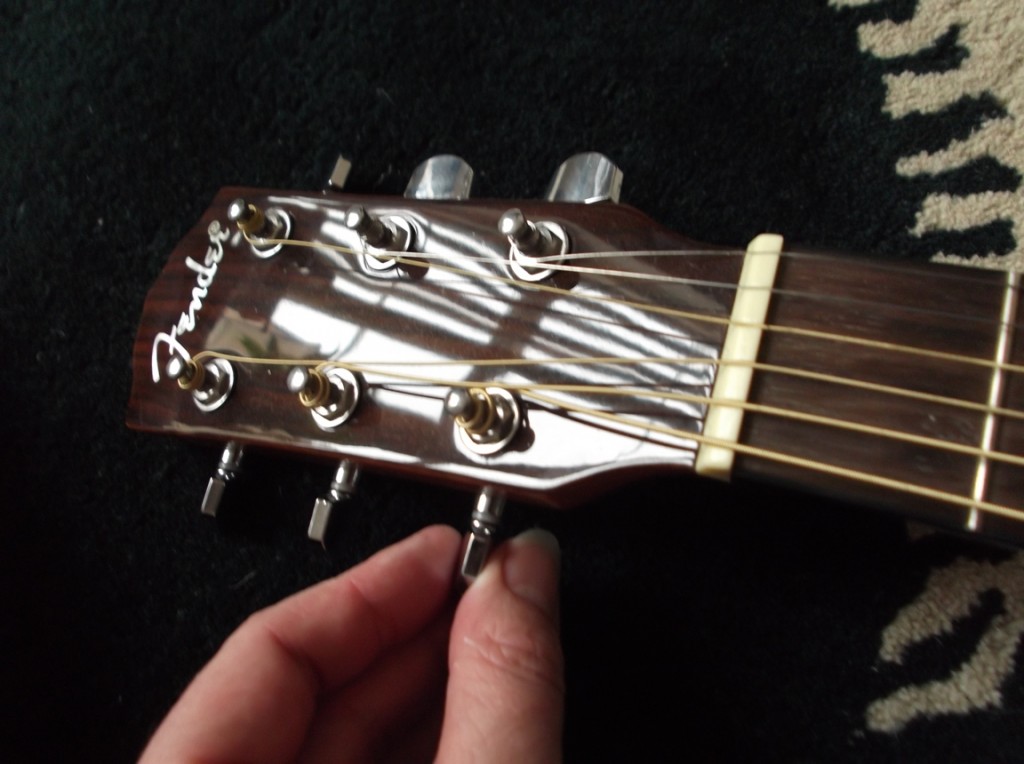
Loosen the strings as far as possible, you do not need to remove them but they do need to be extremely slack so you can lift them high enough to remove the saddle.

If you are feeling flush with a new set of strings then do all the adjustments before fitting the new strings as you really do not want to be tightening and loosening them a few times.

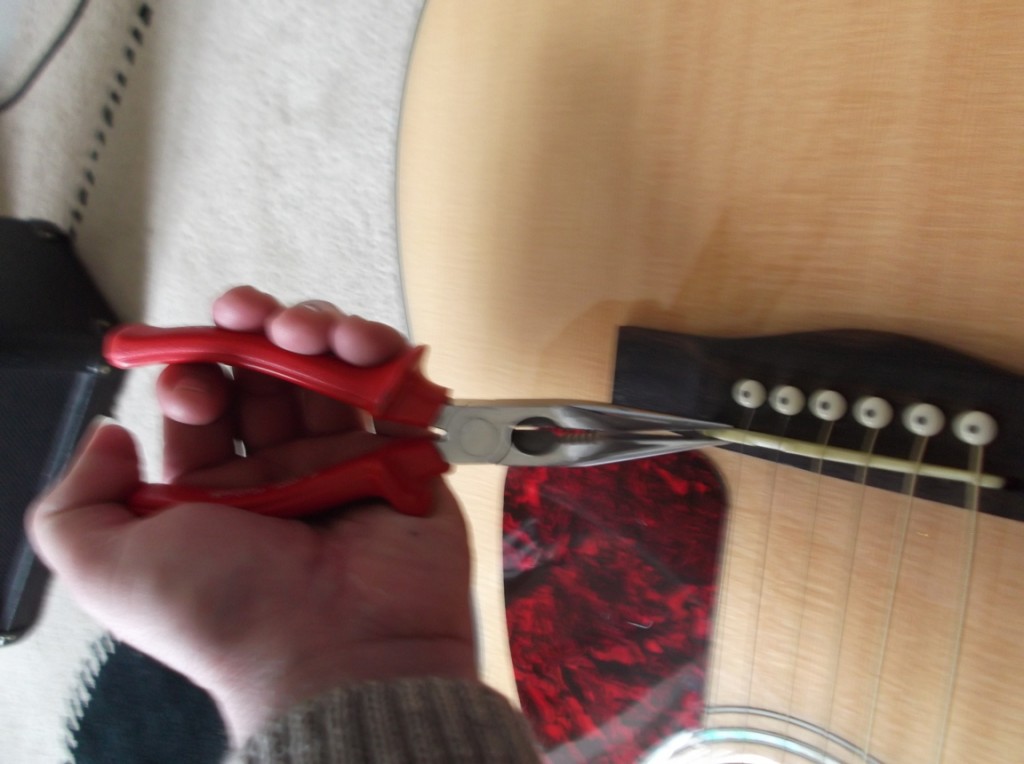
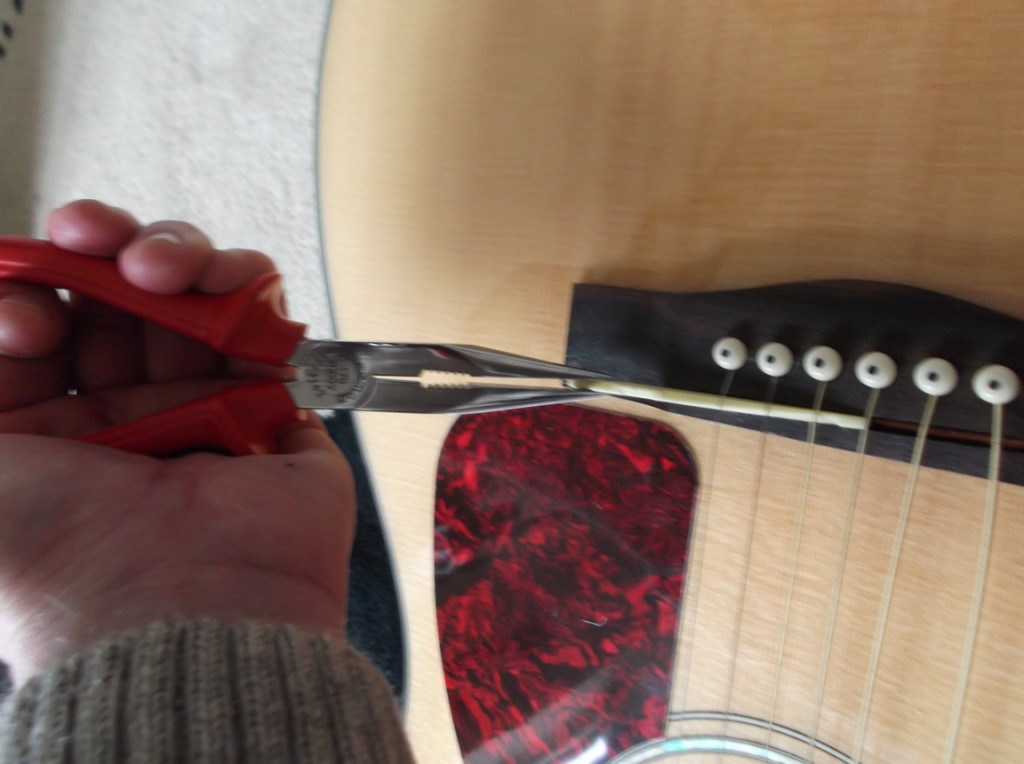
Long nosed pliers removing saddle

When the strings are loose enough, at the saddle carefully lift them as high as possible, care should be taken so as not to cause any kinking.

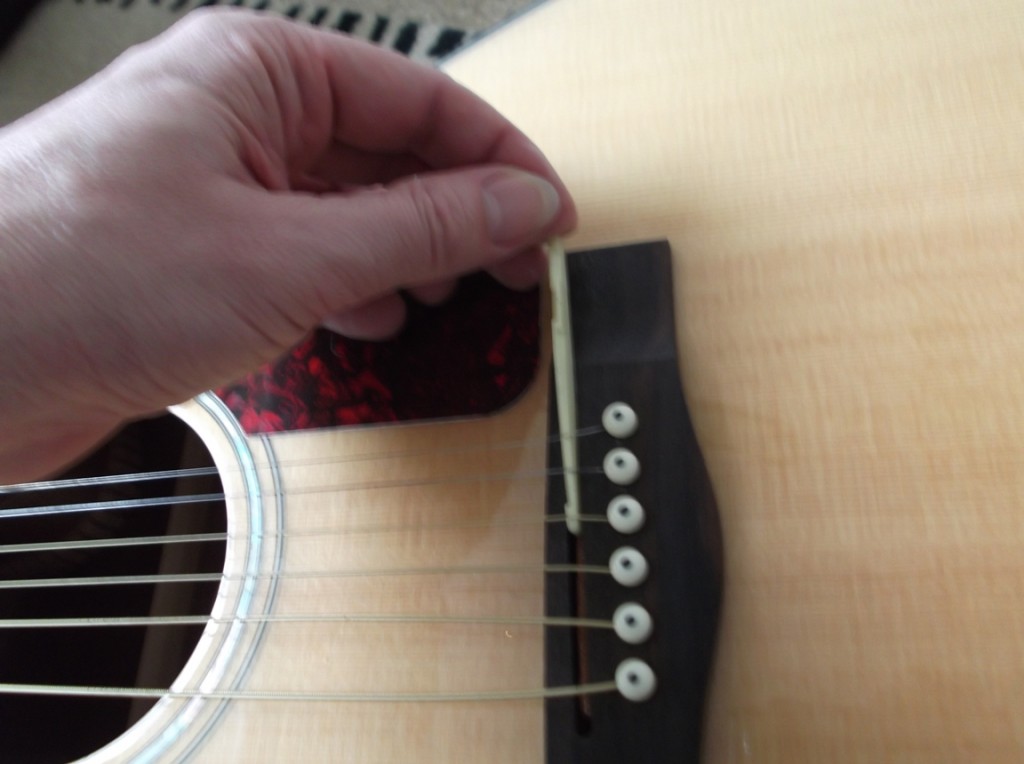
Using the long nose pliers carefully remove the saddle, if it feels tight its important not to try wiggling it out, straight firm tugging will get it out.

Pencil mark

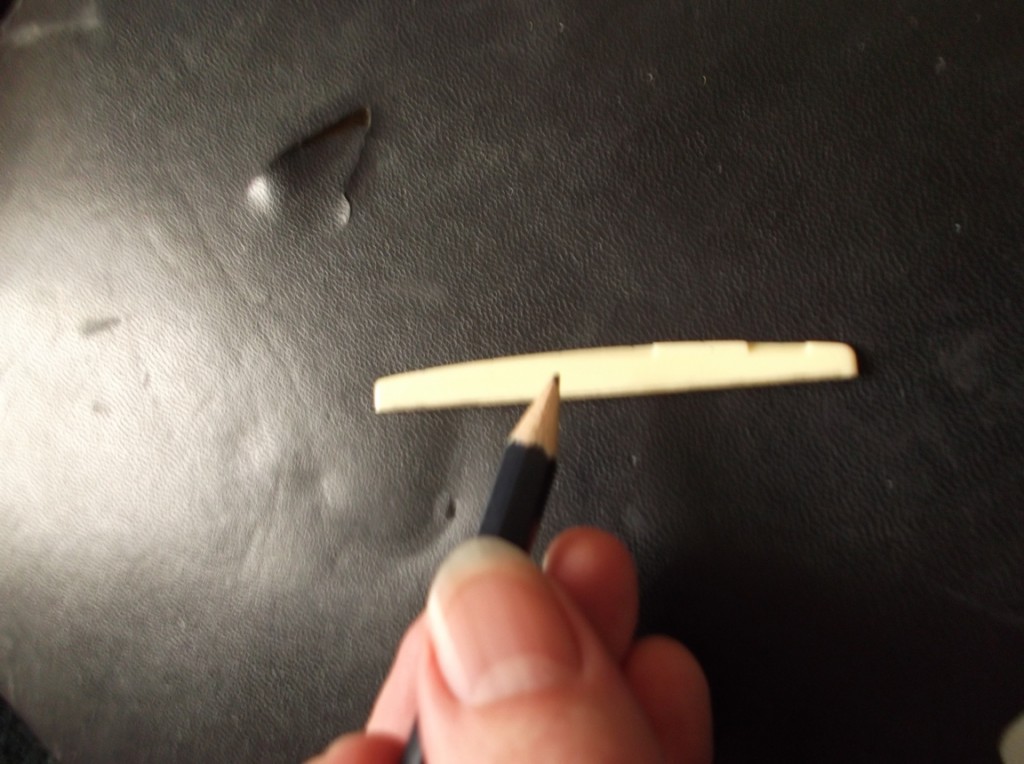
Once you have the saddle removed use a straight edge to mark the base of the saddle, it would be best removing a little less rather than a little more, too much and the saddle being too low could cause string buzz, time and patience is required at this stage, you will feel a joy of achievement upon finishing.

Sandpaper grade

Really the choice is yours but a mid grit ‘P’ is much easier to use, to lower grade and chunks will be taken out of the saddle, because it would be harder to use the chances are the base of the saddle will end up being curved. To fine then it will wear in no time leaving you panting and sweating.

Sanding down the saddle

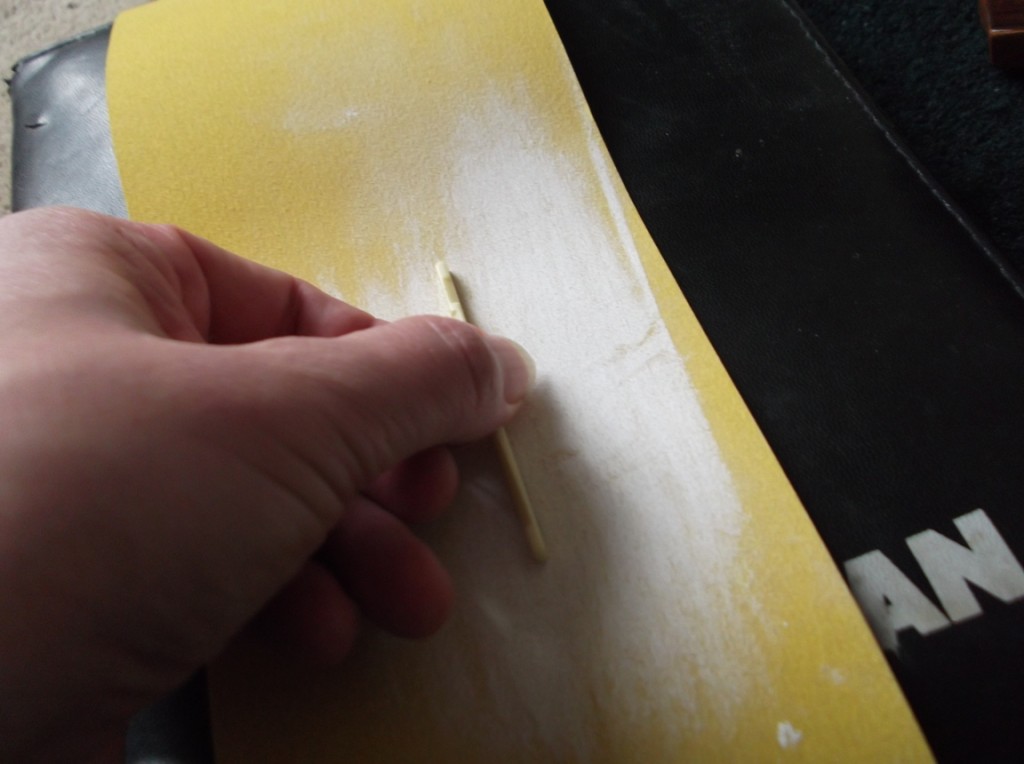
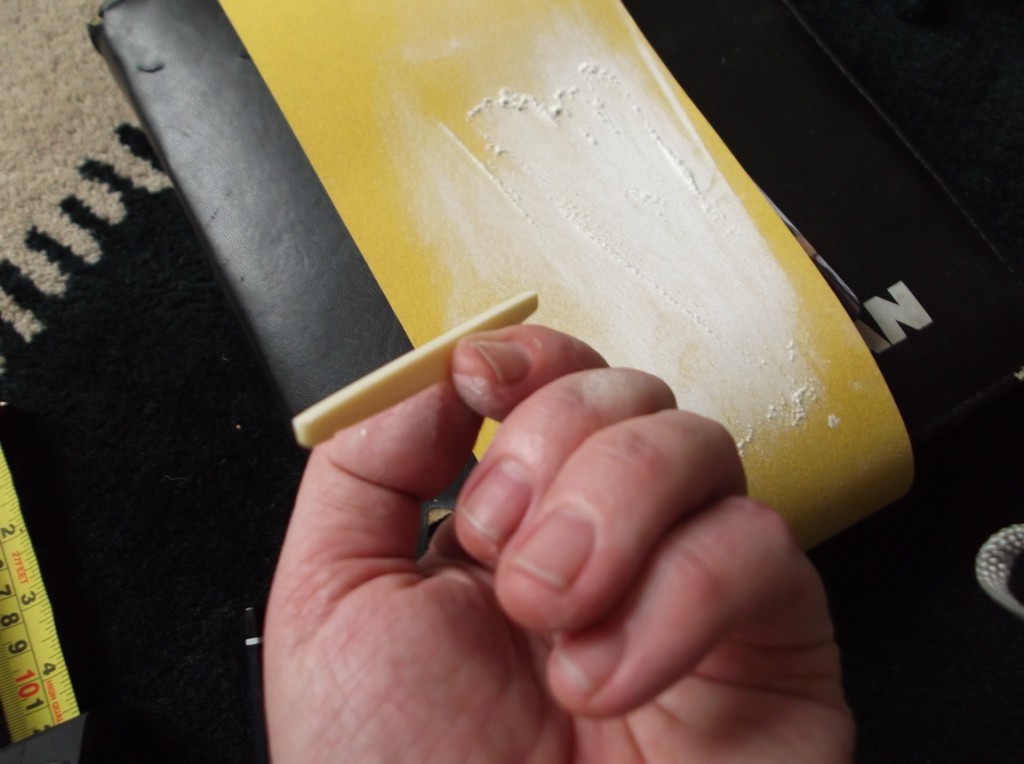
Using a flat surface – like a book – place the sand paper onto it, fold both ends under the book to hold it in place. Carefully hold the saddle with your thumb and forefinger, use your index finger to press down on the saddle.

Start nice easy motions of to and fro sanding the saddle, check every 20 or so movements that it is being sanded down straight, also keep your fingers off the grit surface or you will remove some skin. Once the saddle is down to the pencil line its time to try it out.

Replacing saddle

Lifting the strings replace the saddle back correctly, remember to check the saddle is fit the same, as it could be quite easy to slot it back in facing the wrong way, this will cause problems with the intonation, again care must be taken not to kink any strings.

Tighten strings

A string winder could be helpful, it will certainly tighten the strings much quicker, otherwise bring the strings back into tune.

Measure

All in tune and tensioned then measure the strings at the 14th fret, it’s more important that you feel comfortable rather than having the strings at 2.38mm, if you are near to 3mm then that’s pretty good. Go have a strum and find your way around the frets, if you have managed to drop it a millimetre or two the ease on the fingers is fantastic.

Start again if necessary

If after this it still feels too high have a look to see if the saddle can be dropped further, if it can not and the neck is OK then that’s as good as your going to get, as mentioned earlier most mail order guitars are now manufactured in the Far East, they are usually set up to the 2.38mm bottom E at the 14th fret but hot humid manufacturing sites and then shipped all over the world does cause problems to the body more than the neck.

Follow this very simple and easy guide you will not go much wrong. A sense of achievement will overcome you after your action lowering task, give yourself a very welcome pat on the back and enjoy your new lease of acoustic playing. You have now saved on restoring string height on your acoustic, see how you can also lower your utility bills here, The Utility Warehouse works for me.
167 responses to “How to lower the action on acoustic guitar explained easy”

  1. Paulo Moreira

    Great advices. U really know what youre talking about.
    Keep it like that
    Cheers

  2. I have checked your page and i’ve found some duplicate
    content, that’s why you don’t rank high in google, but there is a tool that can help you to
    create 100% unique articles, search for: Boorfe’s
    tips unlimited content

  3. I see you don’t monetize your page, don’t waste your
    traffic, you can earn extra bucks every month because you’ve got high quality content.

    If you want to know how to make extra money, search for: Mrdalekjd methods for
    $$$

  4. Shaun Mellor

    Hello Stuart
    The tutorial is easy to understand but I am not sure if I dare alter the action on my 1969 R E Spain classical .the depth at the 14 th fret is about 5 mm and I don’t think I would be able to reduce the saddle enough to make the action easier
    Any advice would be welcome and thanks
    Regards
    Shaun Mellor

    1. Eduardo Garcia

      Hello Shaun,

      I saw something interesting the other day; a classical guitar, with the bridge carved a little bit in front of the saddle. I asked myself why then I figured that maybe that was done for two things:

      1) To create more room to file the saddle
      2) Once you filed the saddle, to keep a good string angle; in that way the pressure of the strings keeps the top vibrating. ( the more you file the saddle the more sound you lose)

      I hope it helps!

      Ed

      1. Eduardo Garcia

        loose

  5. Hello blogger, i must say you have hi quality posts
    here. Your website should go viral. You need initial traffic boost
    only. How to get it? Search for; Mertiso’s tips go
    viral

  6. Keith

    Thank you so much for this. I’ve had an old Takamine acoustic that I bought used a few years ago…loved it. Sound is good and stays in tune, but the action was way to high. Just followed your instructions, and did one sanding and got it from a 4+ to just a tad over 3. Put a fresh set of Martin strings and I feel like I have a new guitar ! I’m going to try to shave a little bit more off, but am going to wait until I change the strings again. The saddle on my guitar was really hard to get off. Had to take the strings off to get it out. But well worth it.

    Not sure if this is even an active post, but if it is I would like to give you a huge thanks !!!

  7. Napier Thompson

    I came across this page while looking for something else and I am a little confused. I play guitar, uke, mandolin and various other instruments. I am also building a number of fretted stringed instruments. The advice you give is solid and quite correct and useful to people but unless I have misunderstood, not necessarily useful for the scenario you describe. Yes, too much string height at the nut will always require a nut adjustment and sometimes if a saddle is too high, as is often the case, then you are quite right to suggest lowering it, however what you have described is a guitar with a correct setup upon leaving the factory whose wood has changed through swelling/shrinking due to climatic conditions. It is reasonable to assume that nuts and saddles don’t grow taller due to relative humidity so if you notice your action is getting higher (or less likely lower) since purchase it may well be that the more appropriate adjustment may actually be the truss rod as it may be due to the wood in the neck altering shape, presumably under the tension of the strings, if higher. It wouldn’t hurt, in any case before lowering the saddle, to at least check that your neck has the correct relief for your particular guitar because if it doesn’t then a truss rod adjustment actually be what is needed not a saddle lowering and it may have the happy co-incidental effect of bringing your action back down to where it should be at the same time. Correct me if I’m wrong.

  8. John Bartlett

    P.S. I should have said that I had filed each groove on the nut to lower the strings individually.

  9. John Bartlett

    Hi Stuart,
    Very interesting article and most helpful as I want to lower the action on a Stagg Ovation copy which plays nicely, but would be even nicer with a lower action. I have, in the past, filed and/or lowered the nut on electric guitars to improve the action ( bridges are fully adjustable) and it occurs to me that the same procedure could be carried out on the bridge? This would enable each string to be adjusted independently. Any thoughts ?

  10. Bill Satler

    If you have an Ovation just remove the shim from the saddle. Helps a little.

  11. Fred kehoe

    Helpppp
    I also have this problem. ….
    First of all thanks for a superb tutorial, really helpful. I would like to lower the saddle on my Yamaha APX500lll but it seems different to other saddles. It is not flat on the bottom. Both ends have a ridge about 5mm long which sit over the pickup. The remainder of the saddle is divided into 7mm teeth and I believe these sit on top of the pickup. Do I need to sand down the 2 ends and the 6 contact points across the pickup or do I just try the ends?

  12. I see a lot of interesting articles here. Your blog can go viral
    easily, you need some initial traffic only. How to get initial traffic??
    Search for: bucksmagnet’s method

  13. oggybleacher

    use glass or ceramic or marble surface to sand. and find a good straightedge to see if the saddle bottom is level. a book or wood kitchen table is no good. and there is often a slope so the treble is lower than the bass, done by using two metal fences on either side of the saddle with treble end protruding 0.5mm more than bass end. don’t take this job lightly or you will end up with either a bevel on the bottom or no slope or a curve or step or too low and string buzz. practice on a bone blank first.

  14. Hi Stuart, thanks for all your efforts and great advice, I am contemplating adjusting the bridge height on my Taylor 916ce, and as I play little acoustic and much more electric at the moment, I am used to much kinder actions on my guitars. I’m going to have a go at lowering the saddle which I think is bone, but am concerned with the effect this will have on the piezo pickup underneath and the perfect flat finish required for correct pickup response etc; other than patience and a final finer grain sandpaper, any tips? And what kind of whiskey do you recommend for plucking up the courage? ( the guitar was bought online as I live miles from anywhere ) regards & thanks Kenny

  15. db

    Great tutorial I could have done with this years ago because my first acoustic even a brown bear would not have been able to push down the strings.

  16. Steve Westgarth

    Hi Stuart

    First of all thanks for a superb tutorial, really helpful. I would like to lower the saddle on my Yamaha APX500 but it seems different to other saddles. It is not flat on the bottom. Both ends have a ridge about 5mm long which sit over the pickup. The remainder of the saddle is divided into 7mm teeth and I believe these sit on top of the pickup. Do I need to sand down the 2 ends and the 6 contact points across the pickup or do I just try the ends? Rather than damage it, I’ve ordered 2 new saddles to play with.

  17. Kane Mcleod

    Hi Stuart, sorry I know this is an old post but I have just found it so I am hoping you can find the time to reply.
    Honestly I wish I’d seen this years ago as I’ve discarded many acoustics for this very reason, I’ve built Electrics from scratch but they are a whole other monster and I’ve never really trusted myself to go to town on an acoustic as they seem fragile by comparison, however just last week I managed to snag a very valuable hand crafted acoustic for a steal.
    It plays very well though I would like to lower the action on the higher frets but I am apprehensive, I do however have an old slightly cheaper acoustic with a broken kneck (so it’s dead to me lol) and was wondering if I would be able to sand the saddle from that one using the appropriate measurements for the new one then just swap them out, thus eliminating any risk to the original saddle?.
    Thanks for your time mate.
    K.

    1. Hi, sorry about late reply. if the saddle fits then yes that will be fine.

  18. Jeroen

    Hi,
    I have bought a brand new Fender PM-3. The action at the lower E string was 2.6 mm at the 12th fret. Thanks to the information found here, I managed to set it at 2 mm. No buzz, even when strumming strongly. Now I have a great new guitar that is lovely to play. Thanks!

  19. Ryan

    Thanks a lot! My action has been so high for a long time and this really helped me learn how to fix it.

  20. Mick

    What advice would you give for carrying this out on a 12 string acoustic?

  21. Robert

    Hi Stuart, when measuring string height is the 2.4 from fret to bottom, mid or top of string? Thank you for your help. Great article!

    1. For me, top of fret to string bottom. Any other measurements – that folks do use, are, in my opinion, unnecessary.

  22. Hi Stuart..how are you ..which height is ideal for an acoustic guitar…i lowered my saddle about 2.5mm ..but i noticed the sounds became thinner although very easy to play…i bit confused

    Thank you very much

    1. Hello Rey. Potentially, if the sound is thinner, make sure the saddle is perfectly flat, if it is finished slightly curved the acoustics will be poorer.

  23. NEILL DODD

    Hi just dragged out an old Tanglewood that I’d had set up with a raised nut for slide playing (that old go-to decision, ‘I don’t like playing it, perhaps it’ll make a slide guitar’!) but I never play slide, not well anyway. So I thought I might have a go at lowering the action. Using your site (thanks for using mm, I can’t cope with all those 3/64″) I took less than half an hour to get the action all lovely.

    I did have one query though. When you say ‘mark the saddle with a pencil’ it’s not clear what measurement you should mark here. On another site it was suggested (in sixty fourths of an inch!) that whatever height you needed to lose at the 12th fret should be doubled at the saddle but this seemed far too much and surely depends on the geometry of every individual guitar.

    In the end I compromised at somewhere between the two and even then had to adjust for pencil lead thickness, caution etc. I have ended up with a lovely low setting, particularly for the bottom E which is at around 2.36mm now. Mmmmm.

    1. Correct about the doubling quote. Do it in stages as – like you said, guitar shapes and dimensions can be different. Lowering in stages might feel a pain but it works. I marked the saddle at about 1 mm each time.

  24. Ragu

    Sir,
    I have Cort AD810 acoustic. Its Action is more than 5mm. I want to lower it.But I doubted whether the saddle is clued or not.Can i directly pull it with pliers? or is there any methods to remove that in a safe manner. Pls give some suggestion…
    Thanks…

    1. NEILL DODD

      That guitar looks like very normal construction. I can see no reason why it should be glued. It might seem tight but should come out. Just grab it well with those long nosed pliers. Your worst enemy is tentativeness. If you grab it just a bit you have more chance of slipping off it. To be on the ultra safe side try using a cloth or (really great for extra grip) a wide rubber band between your pliers and the saddle.

  25. Great post Stuart was helpful. My question is , is there possibly an estimation that how should we lowering the bridge say 1 mm so it affects the hight (in mm) at the 14.th fret ?

    1. Hello Alexis. It depends on a few things, if the neck and body are out of shape it would be hard to say, but for each mm lowered then usually times that by two on the saddle. But do check the guitar body and neck.

  26. kevin

    Thanks so much for this. Our old knock about guitar now plays better than my more expensive instrument. You did a very good job of showing just how easy it is. Still can’t believe the action on this cheap Tanglewood.

    1. Cuong K Do

      Hello Stuart,
      My Yamaha fg-160
      -At the low E string:
      It is 6mm from the low E string to the 14th. fret, and the saddle is 3.5mm tall.
      -High E string:
      It is 4.5mm from the high E string to the 14th.fret, and the saddle is 2.5mm tall.
      Do you think my guitar can be fix?

  27. Steve lindon

    Hi Stuart. Fantastic information thank you! I was just wondering if you’re actually measuring from the fret board or top of actual fret? Many thanks.

    1. Hello. The measurement Steve, is from top of the fret. Much easier done with a steel ruler.

  28. Nite

    Thanks for the great advice..

    I just finished adjusting the saddle on my Fender and it took me just a mere 2 hours of about 3 readjustments, and now it’s really smooth and easy to play..

    Keep it up sir!!!

    NL

  29. Excellent article and any guitar play should know how to adjust saddle height. As mentioned in this article many factors affect string height and this method will not cure or fix all problems. If the neck angle is wrong it will not be possible to get string height correct. Take off the strings, slacken off the truss rod until the neck is straight (check this with a 50cm/18″ metal rule). When the rule is laid on its edge along the top of the frets the end nearest to the bridge should be at very close to the top of the bridge. If it is too low or too high the guitar may need a neck reset which is a major repair and very expensive. The entire neck needs to be removed and reset and re-glued. A Luthier will have all the right tools and experience to perform a professional set-up. Fret files and string height micrometers etc are expensive and take time to master how to use. So some jobs are best left to a Luthier. In particular I use string height gauge which is accurate to 1/1000th of an inch to set up the action all over the neck (every string at every fret!). It takes time but results is extremely playable guitars.

    Another point worth mentioning is the radius of the neck of most factory made guitars is constant – it should be compound. The string separation is much wider at the bridge than at the nut so the curvature should be less closer to the body. It is easier to use a constant radius fret board but this results in inconsistencies in string height across the strings.
    As mentioned sometimes necks get twisted and warped so need re machining to get the in the right position. Frets will may need to be removed and replaced which is NOT a job for the inexperienced. The string heights are normally measured from the 12th fret as this is the mid point of the strings and historically is the place where the body starts. Back in the 1920s many Banjo players switched to guitars which became fashionable then. They were used to having access way up the necks and their requests to the makers gave birth to the 14th fret necks we see today. Acoustically the ideal is still the 12th fret as this is half way along the strings (which is why the octave harmonics are there).

  30. Norbert

    Hi Joseph

    Quite right, and quite shameful that so many guitars are sold with incorrect adjustments – it’s like selling a car with the wrong fuel mixture and too little air in the tyres 🙂

    I also think any guitar without a ‘zero’ fret is at a disadvantage.

    David

  31. I have a Martin Sigma that was given to me. Is it common for the space under the strings to be less at the top between the strings and the fretboard and more at the bottom? I eyeballed from the side and noticed this on my guitar.

  32. Andy Hill

    Hi Stuart
    I followed your advise and lowered the saddle to just below 3mm. I completed the whole operation in less than 3 hours. What a difference. My reasonably priced guitar is now a pleasure to play and my fingers no longer feel as if they had been put through a grinding machine. Many thanks for your brilliant advise.

  33. jon

    Thanks for this! Just revived an old acoustic guitar. Perfect instructions! You’re at the top of google for “lower acoustic action”.

  34. Jon Matthews

    Hi Stuart, enjoyed the article but i have an issue with my Martin DR that I would appreciate your advise on.

    I’ve followed your instructions when installing a new bridge but I cannot get my string hight at the low E below 3mm at 12th fret, probably higher at 14th. I’ve got a steel rule and measured and I simply cannot get it any lower without the strings buzzing on the high strings at the 2 and 3rd frets. The guitar body doesn’t seem to have bowled and my nut seems ok (held fret at 3rd and have a slight gap at 1st fret). Also the tension is pretty much straight with only slight bow.

    Any idea what the problem is, it’s really starting to annoy me?

    Thanks in advance

    Jon

    1. Hello Jon.

      Sometimes the neck is not quite square to the body. Bolt on necks can be sorted, but fixed necks are a problem. You could try adding some negative bow/bend through the trust rod. Do try avoid string buzz. Otherwise it would be a major repair, sometimes is cheaper to purchase another guitar.

      Stu.

  35. rsic

    thanks sooo much! i normally just play on my electric, since the strings on my acoustic would hurt my fingers. i didn’t know that this was common, nor was there a fix around this, i had assumed it was my small hands. i was planning on picking up playing again, so i was looking to find maybe a smaller guitar, when i decided to google “strings too far from fretboard” and came across your site. i dropped it down from 5.1mm to 4.6 and it’s already loads different, i’ll be sanding more now but just wanted to thank you first, that’s how excited i am to be playing again thanks to you

  36. noah

    Hello Stuart,

    Hi there! I’ve got a question and hope to receive you kind advice.
    Due to the heat, my guitar that i placed in my living room has a swollen belly.. I’ve since brought it to my office that has air conditioning 24/7. I’ve done all i could but the damage is done. The action is ruined.

    If i am to apply this technique u teach, is it advisable?

    Please do help!

    1. Hello Noah.

      Even though a guitar body can get out of shape, I would say that you can still lower the action, just ensure that the neck is not bent or twisted. A shop would probably advise you to purchase another.

      Stu.

  37. Andy

    Got it done from the first try! It worked wonders, thanks very much for the advice! Quick and easy!

  38. Melanie

    Thank you! I am just learning to play and wondering if I needed a different guitar when I came across this tutorial. I was able to lower the action myself, for free, and it’s much easier to play! Thanks so much!

  39. It should come as no surprise, then, that Pinterest is fast becoming a top social networking tool.
    I recommend using a simple font that is easy to read in a size ranging from 32
    to 40. The more powerful the image, the more interest you will provoke in visitors to your profile
    which in turn will result in your profile attracting more followers.

  40. Thank you, thank you, thank you!!!

    My new Guild was tearing up my fingers after every gig…but I put up with it because I loved the tone.

    I didn’t want to spend the $$ or give up my guitar for 5-10 days at the shop.

    This was simple and now I’m down from 5.5mm to 2.6-ish and it plays like butter!!!

    You rock! Have a wonderful life!

  41. Catherine Moody

    Hi, the problem is that even with the saddle removed completely the bridge is still too high so that no matter how much I sand down the saddle the action would still not be good. This is because the bridge itself and the string holes are so high that even without any saddle at all the strings are about 6mm above the twelfth fret. There is no truss rod in this acoustic Hohner guitar and sanding the bridge down from the top would not achieve anything as the string holes hold the strings too high regardless of how high the top of the bridge is. I am wondering whether to take the bridge off and to sand it down underneath and then to put it back on again as this would lower the whole bridge from below.

    1. Paul Chan

      Hello Cattherine
      I think if you sanded down the bridge, the bridge becomes weaker and not be able to hold the saddle as before, because the total pulling force from the 6 strings are so many kilograms. I may think to tune down the strings to release the string tension. Play with a capo.

  42. Derrick Routledge

    Well Joseph I done this very carefully after following your instructions and I managed to drop the strings down to a good playable hight.My new guitar is a Stagg bought from my local music shop who wanted to charge me £55 to lower the strings which were very high.I now can play up and down the frets with no buzz and no sore fingers.Thanks again for your tutorial.

  43. Dan wood

    Many thanks for this useful guide. I am going to try and do this on an acoustic Bass I have just got my hands on. Do you know if the string heights on acoustic Basses are roughly the same as guitars or will they be different? Really appreciate you taking the time to share your knowledge.

    Dan

    1. Hello Dan. Well, good question, as myself, well I have an acoustic bass. The answer is – yes, the height of the strings most certainly be the same. The only difference is that the bass strings are ‘fatter’ but the action, or string heights should be very similar on all guitars of any types of strings.

  44. scott

    Thank you, thank you, thank you.
    I just bought a Takamine on line. Noticed the action is a little high for me. This is my 2nd acoustic so I wasn’t sure if this was normal. I knew my first one (Fender) was not like this. I found your diy page to lower the strings made me very happy. Seems straight forward. I don’t think I could screw this up! So, off I go to lower the strungs. Thanks a million..

    1. Scott, let us all know how you do!?

  45. Sujith

    Dear Stuart,

    Thanks for the help:) After few tries and a broken “E” string, finally was able to lower the action.God Bless:)

    1. It is proper easy to sort, but takes time and mind!

  46. Jaggs

    Hi,

    My strings are way too high from the fretboard as I move up the neck. I saw some videos to shave off saddle, is that what you recommend also?what precautions I need to take for that.

    Thanks,
    Jaggs

    1. Jaggs, just take it stage by stage, no rushing! Find what you feel ok with?

  47. Sara

    Hi there, I’m so glad I found your straightforward and friendly site! We got our little girl a yamaha beginners classical guitar to let her explore her talents. I started watching a variety of lessons/tutorials with her and soon found myself sneaking her guitar away after shed fallen asleep to practice what she was learning myself! My husband must’ve noticed the sparks in my eyes because last week I opened my very big birthday box to find an acoustic fender tbucket, It was love at first sight. By the way Im a lefty learning on a righty guitar, which feels fine since my right hand has gained a little dominance playing the occasional piano.
    So anyway, the point is that these instructions seem very approachable even for me as I have realized the action is a bit high on both guitars. But before I jump straight into it I wanted to ask you a few questions and I would really be grateful for your time (thanks already for reading such a long post!)
    1- should I be at all concerned about calluses and less sensation on the fingertips of my dominant left hand? My handwriting is already a mess and if I suddenly cant hold a pen write…
    2- the fender was ordered online and was quite hot coming out of the delivery package. Is it safe to renew strings (and lowering action while Im at it) or should I wait a few days for the wood to.. Recuperate or something.?
    3- this is just a random thought and I know its crazy but.. By total coincidence I was filing my nails when I discovered this page.. And I couldnt help wondering how crazy it would be to try the gritty side of a manicure block for this little job? Go ahead and say thats crazy and Ill keep my girly manicure gear away from the guitars (no nail polish on the nuts I promise)
    Bookmarking you thanks again!

    1. Hello Sara, thanks for the mighty comment! Don’t worry about your finger’s, they will take shape and stick to that shape as long as you play. I would let the guitar settle for a few weeks, my action actually went up over the period before I lowered it! As for the manicure block, it’s flat and so it will certainly do…

  48. martin

    Excellent advice and enthusiastic attitude – very useful for non-techies like me!
    Many thanks, Stuart. I’ll buy a few bevvies with the £50 you’ve saved me – and I’ll toast you with every one I drink. Cheers 🙂
    martin.

    1. A few beer’s shared!

  49. mr blues

    Thanks a lot for your instructions. I figured if you can do it to a fender then I should try with my encore. Its now much easier to get those high up bar chords and general playing much more enjoyable. Also did my cheapo classical with similar results. Well done and thanks.

    1. It does save a good amount of cash, and you will most certainly learn from it.

      1. Jace Murdock

        Stuart,

        i want to try this on my Epiphone acoustic, but need to be sure i do it right and not mess it up because it was my dads.
        so, how do i know where to mark the saddle with the pencil, and will it need to be marked each time i sand or not ?

      2. Follow the instructions as you will need to mark it each time. But, an accurate measurement at the 14th fret. Lets say the action was at 5mm, and you wanted to drop it by 1mm, then that would be about 2mm off the saddle. Again, it depends on the neck and body, so, patience is best, a little at a time!

  50. Richard

    Thanks so much for this tutorial, gave me the confidence to tackle the job on my Fender which I love apart from the fight to play 9th chords up the neck … have just lowered action from 5mm to a shade under 3 mm. Feels great now! My advice to anyone else is, try it, it’s not hard but take it slowly. I did it twice and worked my way down rather than take off a whole lot at the start. It’s worth taking the time and easing down to the mark.

    1. Richard

      One thing to add… I found that the G, B & E strings weren’t coming through when I plugged in to my amplifier. On inspection I found when I had replaced the bridge I had accidentally pushed down on the under bridge pickup – I think I must have slid the bridge in and down. I had to reposition the pickup to make sure I had contact all along the bottom of the bridge. My advice if you have an under bridge piezo pickup, make sure you install the bridge vertically, don’t slide it in and down.

  51. Jai Gough

    Hi Stuart.I have a Fender sce and I’d thought for a long time-and it’s so easy to get use to..”poor”action dare I say,that a little further up,it was a little..awkward and noisey changing chords…checked your tutorial out and lowered the action(which it clearly needed)without any issues-3mm works fine for me!An excellent and straight forward tutorial-even slacking the strings(without taking the pins out)is a simple,logical and clever idea!Many thanks.Jai.

    1. Hiya Jai, shop’s can charge a small fortune to do a pretty easy job!

  52. Lars

    Thank you for this tutorial. I wonder if there is possibly to estimation how lovering the bridge e.g. 1 mm will affect the hight(in mm) at the 14.th fret.

    Thanks

    Lars

    1. charles

      The 12th fret is the half way point along the string. To lower the string by 1mm at this point you need to lower the saddle by double this amount ie 2mm

  53. derek

    Thanks a bunch for the simple and straightforward tutorial.

    FWIW, I used some coins to measure the gap
    pennies: 1.52mm thick
    nickels: 1.95mm
    dimes: 1.35mm
    quarters: 1.75mm

    2 pennies stacked = approx 3mm

  54. Richard

    Hi thanks for the info I measured and it sat at about 7mm! but I have measured mine now without the saddle and it still sits at 6mm above the fret???! No way that’s getting anywhere near 2.4mm!! Please help!

    1. Richard

      Apologies it was 7mm before and with no saddle at all it’s 4mm! Still can’t go any lower as no saddle is no saddle! I give up. Matches to burn this guitar please!!!!!!!

      1. Lars

        Have You adjusted the trust rod?

      2. Paul Chan

        I have done replacement saddles from time to time over many years. Now I have got a low saddle, but another problem comes up, that loses volume. The 3rd string (G ) is just touching the saddle and not pressing hard enough for vibration. Tones are dull. I need to do another.

  55. Randy

    Excellent public service you are providing here. Great to hear so many success stories. I’ll be attempting this on my Martin as soon as I get a suitable featuring device!

    One thing I have already done that I think will be of interest, is to change the nut with one that has an integrated zero fret. This mades the sound and action the best possible and eliminates the ridiculous guesswork and variation (and labour) involved with regular nuts.

    This is the place I got it from, and they have a wonderful explanatory video there:

    http://www.zeroglide.com/

    Recommended. I don’t know why all makers don’t make a zero fret as standard. They are great. My Steingerger has one too (from factory) and I love it!

    1. Randy

      …suitable *measuring* device…

  56. playfast

    iup! first of all thanx man for puting thi, reaaly apreciate it!

    i have a serious high problem action on my acoustic guitar. i bought it like 2 years ago and it came by plane from China to Barcelona, and just now with your tutorial that i came to undesrtand why the action is that high.

    so i have an action of 8mm on the 14th fret of the E- 6th string. and as an experiment i removed the saddle, and tight the 6th string to an E without any saddle , just to see what happens, and it still have 5mm from the 14th fret

    ah and by the way. at that point, some months ago i tried to fix it by trying to adjust the truss rod, but now i don’t even know how many turns i already did…

    so, if so if even before the sanding process i have 5mm without a saddle, what would be your recomendation?

    thanx a lot!

    so what would you say to that??

  57. Wally

    I was adjusting the action on my Gibson Hummingbird guitar and the adjustment nut broke off flush with the neck. How would you remove the rod and replace it?

  58. Barrie Clark

    Thanks for the very clear instructions,just finished with my Tanglewood and the difference is superb. I did however go a bit to far for the top E string but nothing a bit of shimming couldn’t fix.

    Cheers.

  59. Stuart, Thank you a thousand times. I love my Fender cd 220 sce again. And it sounds great. I would like to mention if one is performing this procedure on an electric acoustic like I have be careful to not damage the pickup in the bridge. I almost tore mine out thinking it might be packing material.

  60. Am I correct that you measure from the bottom of the string down to the surface of the fret board. Not to the surface of the fret itself ? Thank you for your help.

    1. Hi Graddy, thank you. The measurement is taken from the underside of the string to the surface of the fret, and not the fret board. It is much easier with a steel ruler!

  61. Patrick

    One thing I do not see mentioned here. Removing material from the saddle, changes (reduces) the angle that the strings make when passing over and going through bridge where they are secured by the bridge pins. If alot of material is removed from the saddle, or a significantly lower profile saddle is used as a replacement, it may be necessary to make small groves in the wood of the bridge in order to maintain proper pressure on the saddle. Lower pressure on the saddle may reduce the sound transfer to the top (soundboard).

    1. Patrick, I certainly agree. Also your previous comment about nut angles, its vital that the fret board is not twisted. As for the saddle string intonation angle, obviously on electric this is adjusted by the intonation screws, but for acoustic, unless your really tuned by ear I would suggest not to worry too much about the string angle.

  62. Matt

    Hi Stuart

    I followed your advice, only to find the saddle had several packing strips under it, so removing them lower the action without any sanding!! Might be worth checking for these stops before sanding!!

    1. Yes Matt, a company would either use the strips and if not required they should be sent with the guitar, many don’t!

  63. adam

    Hi Stuart, thanks for the guide. I’m going to try this tonight but one thing I hope you could help me with: my high e string catches on the fret metal sometimes because its very close to the bottom of the neck – is there a way I can adjust this? Would it be on the saddle?

    1. Hi Adam, first of all check to make sure the guitar neck is not bent in any way? Then I would slightly angle the sanding of the saddle, if that does not work slightly shim the underside of the saddle, it takes time but can save you a lot of cash.

      1. Patrick

        I would also check the nut of the guitar. Check for orientation to the neck, maybe slipped, check for nut slot width for string width and any cracks etc.
        Also, shimming the saddle may reduce the sound (vibration) to the guitar soundboard (top). I would replace the saddle as this is an inexpensive item.

  64. David

    Thanks For The String Height Guide. Got My Mexican Down To Specs Rather Easily. Just Finished Work On My Chinese Guild. It Was So Bad That I Had To Lower It A Total Of 8/64Ths By Sanding Down The Bridge Also And Deepening The Slot For The Bridge Insert. Got It To Specs And It Plays Sweet. I Had Sadly Contemplated Burning The Darn Thing! Thanks A Bunch….
    Used My DREMEL To Get The Inserts Close. And I Found Using Drill Bits For Measurement Gauges Made For Accurate Adjustment. Had To Shim The Guild After Completion And Used Shims Cut With Shears From And Old Set Of Automotive Feeler Gauges.
    Thanks Again And Keep On Picking…. 😀

  65. Fahd

    Hi Stuart! Just wanted to thank ya for the easy guide. I’m a total guitar noob (have only had mine for a couple weeks) and felt action was a bit high. I followed your guide and it went flawlessly. Didn’t have to sand the saddle down since I found my guitar came with an additional smaller saddle, so I just replaced them.

    Cheers man. You saved me some dough. Rock on!

    1. Cheers Fahd, guitar shops can charge an awful lot of cash to do the simpliest of jobs!

  66. KarlGramps

    Thanks for the information! I did a combination of adjusting the neck truss, and then the saddle. One thing that I found to make it easier was to use my electric orbital sander on the saddle. I had it marked and took it down nice and even. It plays like a dream now! Thanks again

    1. Yes, it just takes a little of our time which is free!?

  67. MDJ

    hi ,
    i followed you but my saddle suddenly broke do there is any saddle that they sell it on shops or what can i do?????????
    please help!!!!!!!!!!!

    1. Yes shops do sell them, once you have purchased a new saddle, follow the steps and carry out the sanding of the saddle in stages, go easy on it.

  68. mahmoud jonas

    i did the same as i followed you but my guitar started buzzing now

    so what can i do
    please please help!!!!!!!

    1. Hi Mahmoud, first of all, do check that your guitar neck does not have any negative bend, where it bends backwards or downwards as you check, most guitars should have a little positive bend, this also allows to reduce fret buzz.

      If you have gone slightly low, remove the saddle and start by putting some thin packing under the saddle, just to bring it back up that touch, doing this and checking the neck should solve the problem.

      1. mahmoud jonas

        yes my guitars neck has a bend how i can fix it do there is any solutiona?

  69. Jude

    Hey Stuart,

    Thanks for this wonderful tutorial. I managed to drastically lower the action on my new Cort Semi Acoustic. I have a small query – the thick upper E string (6th) strings appears to be slightly lower to the 5th string. Although, the guitar sounds perfect and there’s enough gap between the fret board and the strings I wanted to know whether this is an issue to trouble me and if I can keep things the way they are.

    Cheers 🙂

    1. Hello, near the start of the tutorial I mention about the factory settings, these are;

      E6 – 2.38mm (6/64 in)
      A5 – 2.28mm (5.75/64 in)
      D4 – 2.18mm (5.5/64 in)
      G3 – 2.08mm (5.25/64/in)
      B2 – 2.03mm (5.15/64in)
      E1 – 1.98mm (5/64in)
      So, as you lower the strings they all should drop by the same percentage, If not, and it is only the bottom E string then I would suggest putting some light packing under the nut (before the first fret) of that string, this should solve the problem.

      1. George B.

        Hello,

        Great tutorial. I notice that your text consistently says to measure at the 14th fret but one of your pictures seems to show you measuring at the 12th. Am I mistaken? We are to measure at the 14th, yes?

        Thanks.

  70. D. James Jones, Jr.

    Is there any reason this technique will not work on a ’55 Martin 000-18?

    1. Hi there, this should work on any acoustic that has the removable saddle.

  71. Brian

    Hi Stuart
    Thanks so much for the tutorial.
    I got a new alvarez ap66sp, it`s a parlor 12 frets to the body.
    Question: is it the same measurements I need to use?
    Best regards from Denmark
    Brian

    1. Hello Brian, yes this can be used on shorter scale guitars too, just do not be tempted to go too low.

  72. Hey Stuart! Thanks for the instructions. I have an Ovation acoustic electric, the saddle is much different on the bottom. It has little sqaure teeth, will the same method work? It doesnt appear that I could take much off.

    1. Nick

      Sand from the bottom of the bridge not the top.

    2. Hello, Nick is correct, sand from the underside of the saddle, never touch the top.

  73. fishskicanoe

    I got my kid a new electric/acoustic guitar for Xmas. He had been learning on a nylon string folk guitar. He complained about the strings hurting his fingers but I chortled and pontificated that he just needed to get the calluses built up on his fingers.

    So last night I finally sat down and played his guitar and hell if the fingering didn’t hurt like crazy. Read your tutorial and measured the E string. It was almost at 6mm! Just got done following your directions and got it down to 3mm. The difference is amazing. Not just easier finger but a much better sound. Thanks for posting this.

    1. Hiya, thanks for the complement, and your son will now find learning guitar much more enjoyable, and so will stick to it!

  74. brian

    Hi stuart
    thanks very much for your easy to follow guide , checked the height of strings on my newish guitar and they were about 5mm , got this down to about 3mm put some new strings on and it plays and sounds great , saved some wonga as well !!!

    1. Brian, the all important for these days is certainly saving some, erm, Wonga!!!?

  75. Joe

    Stuart, great tip. I measured my instrument, a mid-1970s Giannini Craviola, and the E6 seems to be right around 2.38. However, when compared to some new instruments in a music store, the pressure it takes to fret at the 1st fret is greater on my instrument. It makes it a little harder for bar chording and arpeggio type picking on the first few frets. Is there anything I can adjust on my instrument to help ease the pressure?

    1. One thing that older acoustics seem to have, are high ‘nuts’ im unsure why? but you can get a lower nut (leading to the first fret), put slight positive bow on the fretboard and then go through this tutorial, it will work Joe.

  76. Jono

    Thanks for the great tutorial. Very clear and concise, but despite that, I still managed to balls something up! 🙂 I stupidly filed down the wrong side of the saddle. I just flattened down the curved side to the size I want. So now I have a rectangular saddle, without the curve that it’s supposed to have. It seems to be fine and plays better than before with the lower action but do you think this’ll cause problems? Should I buy another saddle and do it again (hopefully correctly next time!!)??

    1. Yes you really need another saddle, now the main problem will be the intonation, as you play higher up the fretboard and with open strings it will sound out of tune.

  77. Josh

    Stuart,
    just wanted to know if the mm im trying to reduce of the string-fret distace, corresponds with the amount i should sand off the saddle.. so if i want the strings to be just over a mm lower, would i try to sand 1mm off the saddle? i hope this makes sense to you haha!

    also, this tutorial is fantastic, so easy to follow and understand! Gave me the confidence i needed to try this, i just wanted to double check with you before it did. thanks!

    1. The answer to that Josh, to lower it 1mm then you need to take more than that off the saddle, but, many folks play with some positive ‘bow’ on the fretboard, this can help reduce fret buzz but also requires more taken off the saddle.

  78. Connor Coop

    A new Acoustic i bought has strange action in that it slopes, with it being close to the frets on the first, and progressively further apart up the fretboard.

    What can i do to remedy this?

    1. That is quite normal Connor, folks many times have some positive ‘bow’ on the fretboard, but if its too much then it will need taking back slightly before lowering the action.

  79. Reza

    This is not only an easy guide but a complete, logical and decent one.
    Thank you so much.

    1. Thank you Reza, too many online tutorials are full of technical jargon and big workshops, this I do try avoid.

  80. Dave

    This really works, I was reluctant to try it, but your tutorial made it look so easy; now its a pleasure to play my transformed guitar.Brilliant, thank you .

    1. Thanks Dave, its really cheap too, we know music shop need local custom but in these times saving between £50 – £100+ is alot of cash, and the guitar does feel like something else once you settle for your optimum string action height.

  81. Brendan

    Hi Stuart
    I followed your advice for lowering the saddle on a guitar I bought. Once I got it out I found some card under it as it appears to have been raised previously. Just by taking this out it has improved things a lot. It does look like it could come down a bit more. My question is if you get the E6 close to 2.38 mm will the others automatically be within their optimum range or is it necessary to sometimes lower individual strings. If so how would I do this? Thanks for the great advice so far.

    1. Hello Brendan, thanks, and the answer is no, providing the saddle is filed evenly the strings will all lower correctly in parallel, glad you found this easy to follow, hoping it saves folks cash and gives them more reason to carry on playing with potentially difficult guitars.

  82. david

    hi,
    I was hesitant to try lowering the action on my 20 year old breedlove since i didn’t want to mess it up, but i followed your steps closely and now have the action at 2.4 mm. I feel like i’m playing a new guitar!

    Thanks!

    1. Thanks David, I try to explain everything as easy as possible, too many articles of advice use the technical terms, although technical terms are correct, most of us do not know what they mean!

  83. Giorgos Therioudakis

    My deepest thanks to you. I actually pulled it off! I never would have tried it by myself but for your simple advice and encouraging words. I was too afraid I would cause some kind of damage. Now it’s like I have a brand new guitar ! I can’t thank you enough! God bless you, friend Stuart ! My only regret is I didn’t try it years ago…

    1. Hi Giorgos, we all get a little frightened before attempting any kind of adjustments to an instrument, my idea is to show just how easy it is for those without a workshop and all the flash tools, in the future I will post other videos on how to make various adjustments.

  84. Reese

    Hi Stuart,

    Do you have advice on how much of the saddle to sand off?
    For example, if the strings are at 4mm at the 14th fret, does that mean I need to sand off 1mm of the saddle to get to 3mm?

    Thanks,
    Reese

    1. Hello Reese, yes that tends to be the case, but go steady, it might need a few attempts, but well worth it, and much cheaper than taking it to a shop.

  85. Abraham

    Hi Stuart

    Thanks for the good advice I have lowered the saddle as far as I can go but can’t go any further. The low E is about 3.5mm at the 14th fret, but the guitar still feels very stiff especially in standard tuning. What else can I do? I have thought of sanding the area between the saddle and the pins where they slot into the bridge down so that I can get more clearance and hence shave more of the saddle down. Would I ruin the action if I did that? I need to take off a couple of millimeters off still I think to get it right but I’m stuck at the moment.

    1. Hiya Abraham, sometimes we just can not get the action low enough, you can sand that area a little but be careful not to make the slot loose for the saddle, this can cause some problems with the intonation, also do check the the fretboard is not too curved, we do not want a dead flat fretboard, just a little bend that cuts out string buzz for lower action.

  86. BAMABOY

    Stuart,

    Thank you so much for your tutorial on adjusting the action on an acoustic guitar and giving me the confidence to it myself. I have a Martin HD-28 and have always been very apprehensive about doing any kind of work on it. Your advice really improved the action and playability. Thanks again and I hope you have a Happy Thanksgiving!

    BAMABOY

  87. Thank you all for the great comments! it has been asked if the saddle should taper down from the wound strings, yes it should, a saddle that is square all the way down will make the treble strings much higher than the bass/wound strings, we are looking for the action to be correct along the under side of the strings and not the centre of them.

  88. Chaitanya

    Thanks so much, you’re a legend! I just saved myself $75 by shaving the saddle myself. I had a question for you: the saddle of my guitar is lopsided – it’s higher on the bass side and tapers down towards the treble side. Is that normal for acoustic guitars, or is it something I should fix? Thanks again!

    1. Yes it should taper, another good question that I will include in my tutorial, thanks for asking!

  89. Jack

    You’ve been a great help. Very simple, easy to understand instructions.

    Thank you!

  90. David

    A big thank you from a newbie.
    New guitar and puzzled by the distance at the 14th fret I plowed through the you-tube tutorial’s but didn’t feel convinced till I came across your excellent advice.

    Thanks again.
    Your obidient servant,
    Dave

  91. Sean

    Hi Stuart, great tutorial.

    Just wanted to be clear about something – when you say string height at the 14th fret, are we are talking about height over the fret itself or the fretboard? I’m assuming it’s the fret but I just wanted to be sure.

    Sean

    1. Hello Sean, good question, I always measure to the fret, I have noticed on other folks explanations that they sometimes measure to the board, I find that abit pointless as its the playing height, this is to the fret, also too many folks measure at the 12th, as can be seen on my video intro, manufacturers indeed measure at the 14th, this acoustic is a Fender. Hope this helps, in fact I will include this information into the tutorial!

      1. Sean

        Thanks Stuart, I’ve now used the info in your tutorial to lower my low E action at the 14th fret to 3mm. I think I could go down a little more, but I’ll stay at this for a week or two and see how it goes. Thanks again!

        Sean

  92. Simon Cooke

    Thanks for this very clear tutorial Stuart and an interesting site to delve around too. I found it after watching some numpty boy on Youtube went about showing how to adjust the action with the truss rod – alarm bells!
    I’ve just bought a lovely Cedar top Adam Black acoustic very cheaply off Gumtree – fantastic tone and looks as new, but slightly too high an action for me. I can’t wait to get it down a millimetre or two now. Cheers, Simon.

  93. Ian Nicholson

    Hi Eric,
    Just recently traded my electric for an acoustic guitar. Barre chords are a real pain to play. My strings are over 4mm in height which explains my difficulty in playing. The neck looks ok though. The point of my reply is that I have always paid others to adjust my guitars. I couldn’t shell out the money this time since I have just been made redundant so have to think twice before spending. Took the plunge to have a go at diy and found your web site by accident although I knew what I was looking for. After following your easy to follow lesson I have successfully transformed my guitar into a more pleasurable instrument to play.
    A superb lesson
    Thank You!!

  94. Ric

    Thanks so much for the tutorial. I bought an old guitar on which to teach a friend, and this completely brought it back to life so she can now learn with much more ease!

  95. david bantock

    Hi , Followed your guide to lower the action of my averaged priced dreadnought guitar out of China and with caution managed to get to 3mm from over 4mm by sanding the bridge . Improved the action no end and no buzz. I also made the adjustment with the truss rod loosened and then after tuning I made adjustment to the truss rod just to take it into tension. Not sure if this is of any significance but your guidance gave me the confidence to attempt the work. Thank you.

    regards david bantock

    1. Hello David, doesn’t it make such a difference, in real terms its about 30% less force on your fingers, much more pleasurable and certainly keeps the momentum going. I’m glad I could help you.

  96. Eric

    Hi Stuart,
    Thanks for taking the time and effort posting this tutorial. A very easy effortless and minor operation with maximum effect! Happily playing before and now even doubly so.
    Sunshine to you,
    Eric

    1. Thank you Eric, It needed to be shown as easy as possible and without a workshop just how easy it is to get a guitar more comfortable to play.

  97. Stuart, thank you so much for this great tip. My el-cheapo Ashton plays like a Martin now. OK, well, maybe not, but it’s so much better now.

    Cheers from New Zealand,
    Joe

    1. Hi Joe, and glad you found it helpful in making a cheaper guitar certainly sound much better, too many folks get put off of learning guitar as they think cheap guitars can not be made to play well, oh yes they can!

  98. koen

    lovely tutorial! Very helpfull, but do you mean 12th fret instead of 14th fret?

    1. Thanks Koen, the factory settings are at the 14th fret, I show this at the start of the video, its potentially where some folks get confused as too many articles advise this wrongly.

  99. James Robinson

    Hi Stuart,
    Once again thanks for your advice on lowering the saddle on my guitar. Did you say you have a web site of similar information? Because I was only able to lower my strings 2mm I am thinking of replacing the nut so I can raise the strings at the nut and lower them more at the saddle. This is because if I reduce any more at the saddle I will have a buzzing at the first fret.
    The difference your advice made is I cannott put down the guitar now whereas before I was reluctant to pick it up because it hurt too much.
    Many thanks,
    James

    1. Hello James, glad you have managed to lower your strings enough to feel the guitar better, we order these guitars on the promise of low action only to find the action is huge.
      As for the ‘nut’ it could be an idea to make sure your fretboard is not absolutely flat, many players allow a little loosening of the trustrod to allow a little positive bend, this can also allow more lowering of the strings avoiding ‘buzz’.
      I only have my advice and ‘how’ pages on this site with the YouTube videos, covering alsorts of things as I find out for myself.

  100. Hi Joseph.

    Glad you found my tutorial of help, too many advice articles are in workshops with all the tools on the planet, this is in my living room, not messy and easy to follow, thank you for the nice comment!

  101. Hello,

    Thank you for this tutorial. I just made an old guitar playable again!

    Joe

Leave a Reply to mr blues Cancel reply

Your email address will not be published. Required fields are marked *

Follow by Email
WhatsApp
FbMessenger